How to Blog about Your Stand Up Rally
Home Leadership Resources How to Blog
 To help you get the word out about your successful October 20 Stand Up Rally—and share pictures and video with all the world—the national Rally Team has provided blogging accounts for every Rally Captain.
Not only will your rally report appear here on the Stand Up Rally website, but it will be automatically broadcast to the Stand Up Facebook page, and show up in Google search results.
If you’ve ever blogged before, especially on the WordPress platform, blogging about your rally will be a simple task for you. But even if you’ve never blogged before, these instructions will guide you through the process, step by step:
- Logging in and and creating your Rally report
- Titling your Rally report
- Writing an exciting Rally report
- Adding links to your report
- Uploading and placing photos
- Embedding videos in your report
- Adding tags (optional)
- Saving and publishing your report
- Sharing your Rally report
Logging in and and creating your Rally report
A week before the October 20 Rally, you were sent a special email message with a link to the login page, along with your username and password. Follow that link—or find the “Site Admin” link way down in the footer at the bottom of each page on this site—to log into your blogging account.
Once you log in, you’ll be on the “Dashboard” page. Look for the “+ New” link on the top of the page and click it. A fresh blog post will be opened for you, and you can get started writing up your report!
Titling your report
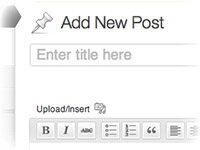 At the top of the “Add New Post” page, you’ll see a space that says “Enter title here.”
They key to a good title is to provide an engaging “hook” to help it stand out, while keeping the title short enough to fit on one line. Titles longer than one line don’t look as good on the page.
Your title could “name drop” a notable speaker at your rally, highlight the large number of attendees or emphasize the enthusiasm of the crowd. You might include the name of your Rally site if its well know, your city’s nickname (like “The Big Apple” for New York or “The Windy City” for Chicago). Some examples:
- Thousands Rally for Religious Freedom in Timbuktu
- Timbuktu Mayor Tells Rally Crowd: “Fight the HHS Mandate!”
- Crowd Vows to Fight the HHS Mandate at Timbuktu Rally
Writing an exciting Rally report
A good Rally report will include such key highlights as how many people attended the Rally, the names of your most notable speakers and what they talked about and how the crowd responded to the event.
You don’t need to provide exhaustive details about every speaker or activity or the various groups in attendance. Instead, pick out the most interesting aspects of your rally and highlight them.
If there were any notable incidents involving police or counter-protestors, include them in your report. And link to any news stories you can find about your Rally (see Adding links to your report, below).
Be sure to keep paragraphs short. When online readers encounter paragraphs more than a few lines long, they stop reading and start skimming. If the paragraph is longer still, they stop skimming and give up. Paragraphs of one to three sentences are ideal.
Your report will also be more eye-catching if you a a good photo right at the top of the page (see, Uploading and placing photos, below).
You can also make your report more engaging by the moderate use of italics, bold type, or even block quotes. At the top of the writing area, you’ll see a toolbar with buttons for styling your text this way.
Adding links to your report
You may want to include links in your Rally report—like to your Rally’s Facebook event page, online news stories about your Rally or your own website.
Don’t just paste the plain URLs (like “http://standuprally.com”) for the links you want to make available to your readers. Not only will that look bad on the page, but the URL might not even work that way.
Instead, use make a link out of some relevant text in your post, as you see so often on websites everywhere. For example, you could make the words “great story in the Timbuktu Times” a link to that story.
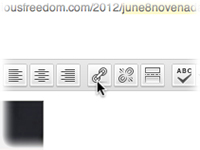 First, select the text you want to make into a link. Then click on the link icon, in the WordPress writing toolbar (it looks like a chain link). In the dialog box that pops up, paste or type the complete URL for the page you want those words to go to (including the “http://”), and click “Add link.” That’s all there is to it.
Uploading and placing photos
If possible, include pictures with your Rally blog post. This will be easiest for you if you write your blog post first, and then add pictures.
 To add a picture, place your cursor at the beginning of the paragraph you want the picture to appear next to.
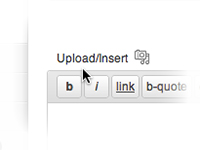
Look above the writing toolbar, for the words “Upload/Insert” next to a little media icon. Click there and a dialog box will pop up for you to upload a picture, either by browsing your hard drive or simply dragging and dropping.
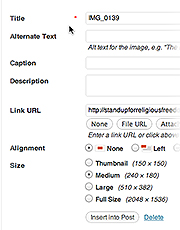 Once your photo uploads, you’ll be given some fields to fill out as follows:
- Title: You may leave this unchanged.
- Alternate Text: You may leave this blank.
- Caption: Type a caption for your photo, if you wish.
- Description: You may leave this blank.
- Link URL: Click “None.”
- Alignment: Choose either Left or Right.
- Size: Keep the default size of Medium.
Finally, click on “Insert into Post” (not “Save changes”) to place your picture into your report.
Embedding videos in your report
To embed video in your post you’ll first need to upload your video to Youtube. To do that, you’ll first need a Youtube account. You can use your Google account if you have one or create an account here.
 Once your account is set up, click the upload button at the top of the page and follow the simple instructions. When your video is uploaded, you’ll need to get the embed code to put in your post.
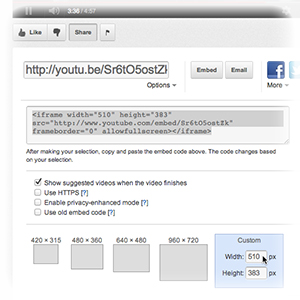
First, go to your video and click the “Share” button underneath the player. Then click the “Embed” button. Next, scroll down to the blue box labeled “Custom” and enter 510 for the width. The height will automatically adjust and change the code for you.
When that’s done, copy the highlighted code that begins with “<iframe” and paste it into your post where you would like your video to be.
Adding tags (optional)
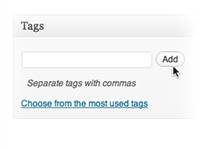 If you wish, you can add tags to your post to make it more easy to find by search engines like Google. Simply write pertinent words or very short phrases like your Rally city, “religious freedom”, rally or names of prominent speakers in the Tag box separated by commas and click “Add”.
Saving and publishing your report
 It’s a good idea to save your work periodically while writing up your report. Under the “Publish” menu on the right side of the page, click “Save Draft.” You can see what your report will look like by clicking “Preview.” Under the “Categories” section, check the box for October Rally Reports.
When your report is finished, click “Submit for Review.” A member of the Stand Up IT Team will review your post before publication to make sure everything is as it should be.
In the hours and days immediately after the Rally, the IT Team will be closely monitoring the Stand Up blog for new reports like yours. Please be patient, as it there may be several other reports ahead yours requiring final review. It may take up to 24 hours for your post to appear, though every effort will be made to approve your report quickly.
Sharing your Rally report
To share your post on Facebook, Twitter, other websites or via e-mail, simply go to your post once it’s published, copy the URL from the address bar of your web browser, and paste it into your desired social media, website or e-mail message.